Overview
This manual covers all you need to know in order to use the Bible plugin effectively. Please note that this manual only covers everyday usage. It does not include the theming guide or setup instructions, as they are covered in depth on their own help pages.
The Bible plugin has five different modes: Search/Query, Bible, List, Theme, and Settings. You can toggle among the modes by clicking on the icons at the bottom of the plugin. This guide covers each of these modes in order.

Search/Query Mode

Search/Query Mode is where you query Bible references.
- Bible: Select a Bible to query here.
- Reference: Type in a Bible reference here. Relevant Bible books automatically display as you type.
From version 1.3.0 and above of the plugin, you no longer need to type in an entire Bible book name in the Reference field. The plugin will try to guess which book you are referring to, based on the first characters of each book of the Bible you have selected. Taking the King James Version as an example, you can type "1 cor 11:23-26" instead of "1 Corinthians 11:23-26".
Bible Formats
Typed Bible references are case-insensitive and ignore diacritics. They must be in one of the formats listed below.
| Format | Example | Result |
|---|---|---|
| [BOOK] [CHAPTER] | Psalms 23 | Psalms 23:1-6 (all verses in the chapter) |
| [BOOK] [CHAPTER]:[VERSE] | Matthew 5:14 | Matthew 5:14 (single verse from chapter) |
| [BOOK] [CHAPTER]:[VERSE]-[VERSE] | 1 Corinthians 11:23-26 | 1 Corinthians 11:23-26 (all verses from starting verse inclusive to ending verse inclusive) |
| [BOOK] [CHAPTER]:[VERSE]- | Hebrews 11:39- | Hebrews 11:39-40 (all verses from starting verse inclusive to last verse of chapter inclusive) |
Once you have selected a Bible and inserted a valid reference, you can either click the Submit button or tap the Enter key on your keyboard. You will be redirected to the Bible Mode.
Bible Mode

Bible Mode is where you will be spending most of your time with the plugin. Here, you can browse and select verses for display.
Click on a verse to display it. You will notice a blue border appear and the verse is highlighted. Click the same verse again and the verse will stop being highlighted, although the blue border remains. (Exact color of border depends on the OBS Theme you have selected in Settings Mode.)
- A highlighted verse means that the verse is currently being displayed.
- A blue border indicates that the verse currently has focus. You can use the arrow keys on your keyboard to easily move between verses. You can also tap the Enter key to toggle the verse's visibility instead of clicking.
In the toolbar is a list of buttons, each with useful functionality. You can hover over each button for a quick summary of what each does.

(from left: Refresh, Show/Hide, Change Verse Range, Previous Chapter, Next Chapter, Add to List)
- Refresh
- Refreshes the verses. Useful if you change themes or certain settings. Please note that any verse currently showing will be hidden.
- Change Verse Range
Set a different starting and ending verse within the current chapter. Defaults to the first and last verse of the chapter.
This is useful in live settings where you know the chapter a speaker is speaking from but don't yet know the exact verse number.
- Previous Chapter
- Navigate to the previous chapter. This button is disabled if there is none.
- Next Chapter
- Navigate to the next chapter. This button is disabled if there is none.
- Show/Hide
If a verse is visible, hides the verse. If not, shows it.
This is useful if you have navigated away from a verse while it is displaying and quickly wish to toggle its visibility.
- Add to List
- Adds all the verses to the Verse List.
List Mode

The Verse List, or List Mode, is where you can save passages for quick navigation between them. Click on any item in the list, and you will be redirected to Bible Mode with that passage loaded.
You can reorder items on the list by dragging the handle on the left side of each item. You can also remove a list item by clicking on the trash icon at the right side.
In the toolbar, you can click the X icon to remove all items from the list.
Theme Mode (List)

Theme Mode is where you can browse, apply, and edit themes.
When you first enter Theme Mode, you will be presented with a list of available themes. You can click on any theme and it will automatically be applied. However, please keep in mind that you may need to click the Refresh button in Bible Mode for your text to display correctly.
Themes are divided into various categories. There are free themes, coffee themes, various theme packs, and custom themes. Of these, only custom themes can be edited.
There is a row of buttons at the right side of each theme. They allow you to Copy, Edit, and Delete themes. Depending on the theme category, whether you are using the free/coffee version, and whether you have purchased theme packs, some of these options may not be available.
You can create a new theme by clicking the Create New Theme button in the toolbar. Alternatively, you can copy an existing theme in order to edit it. A new custom theme will appear at the bottom, which you can then edit.
If you click the Edit button, you will be redirected to the theme editor.
Theme Mode (Edit)

Besides viewing and applying themes, Theme Mode also includes a built-in CSS (Cascading Style Sheets) text editor for creating and editing themes. From here, you can edit your theme's CSS as well as use fonts from the Google Fonts library .
Enter Ctrl + S at any time during your editing to save the theme and apply changes. If the theme you are editing is selected and visible, you can see the results instantly on the connected Browser Source.
In the toolbar, there are four buttons you can use.
- Return
- Go back to the list of themes.
- Show/Hide This Theme
- Toggles the visibility of this theme. Useful for quickly checking visibility transitions.
- Save
- Saves the current theme. If it is already selected, changes will be applied instantly. You can also trigger a save by using the keyboard shortcut Ctrl + S.
- View Theming Guide in Browser
- Opens up the theming guide in your browser.
You can set the following fields.
- Name
- The name of your custom theme.
- Google Fonts
- Fonts from the Google Fonts library that you wish to use. As you type, fonts will automatically be suggested. Click an existing font to remove it. After typing a font name, hit Enter to use it. Please keep in mind that the suggested Google Fonts list is only updated periodically with each plugin update, and as such may not be entirely up to date. You can see when the list was last updated by scrolling to the bottom of the Settings mode.
For further information, please refer to the theming guide for detailed instructions on how to use CSS to style your own themes.
Settings Mode

In Settings Mode, you can adjust many options related to layout, UI, and others.
In the toolbar, you can click the help icon to open up this manual in your browser.
- OBS Theme
- Changes the appearance of the plugin to fit with one of the three OBS Studio themes (Dark, Rachni, Acri). This option is purely cosmetic and does not affect output in any way.
- Font Scale
- Scales the font sizes of displayed Bible verses. Useful if the font size is too large or small and you don't want to modify a theme's CSS directly. A font scale of 1 means no change, 2 means double the size, 0.5 means half, and so on.
- Maximum number of lines
Automatically splits a Bible verse into multiple slides if the number of lines would otherwise exceed this setting. To disable, set the number to 0. Note that not all Bible languages may work well with this enabled. For information on languages and compatibility, please refer to this FAQ question. This option can be combined with the Display height setting. You may need to click the Refresh button in Bible Mode after changing this.
Split verse references will automatically have a letter appended during display on the Browser Source (e.g., 1:1a, 1:1b, etc.).
The slideshow below has an example of this setting in action on the longest verse of the English Bible (Esther 8:9):
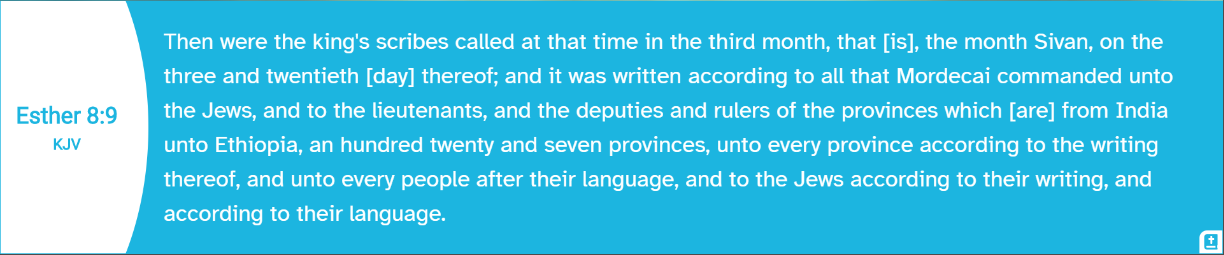
Esther 8:9 - Max Lines Setting Disabled (set to 0) 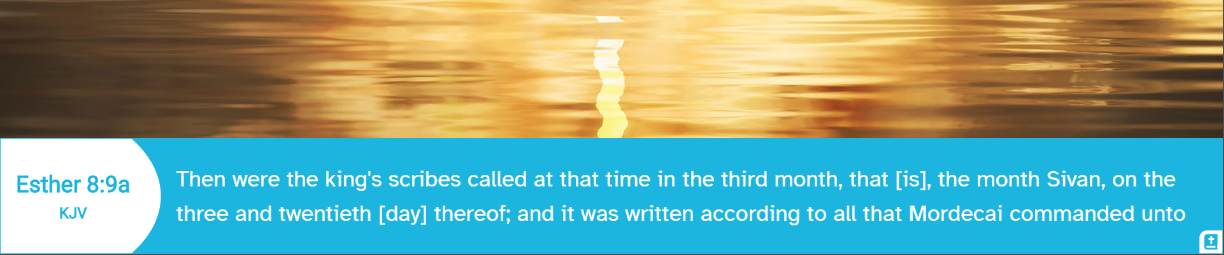
Esther 8:9 - Max Lines Set to 2 (a slide) 
Esther 8:9 - Max Lines Set to 2 (b slide) 
Esther 8:9 - Max Lines Set to 2 (c slide)


- Display height
Configures how tall each verse slide should be. You can choose from one of three options: Automatic, Longest verse, or Standard. This option can be combined with the Maximum number of lines setting. You may need to click the Refresh button in Bible Mode after changing this setting.
- Automatic
- The default setting. The display height depends solely on the length of each verse of the selected Bible passage.
- Longest verse
- The display height depends on the longest verse of the selected passage.
- Standard
- The display height is the same throughout; it depends on the height of the connected Browser Source.
The slideshows below illustrate how each option works. The red border in the pictures marks the size of the connected Bible browser source in OBS Studio.
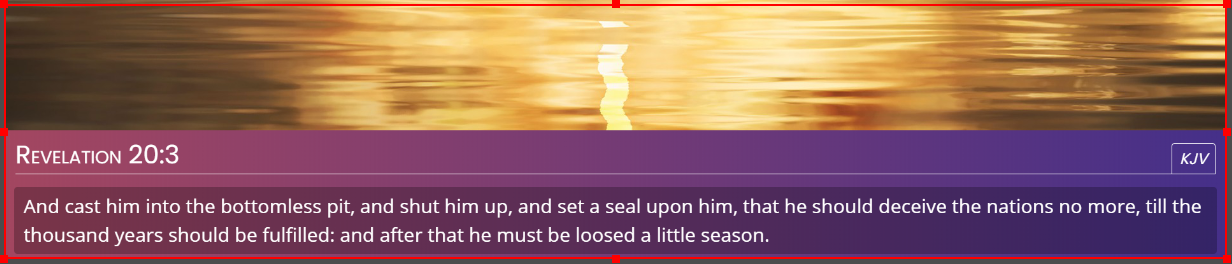
Automatic display height
Revelation 20:3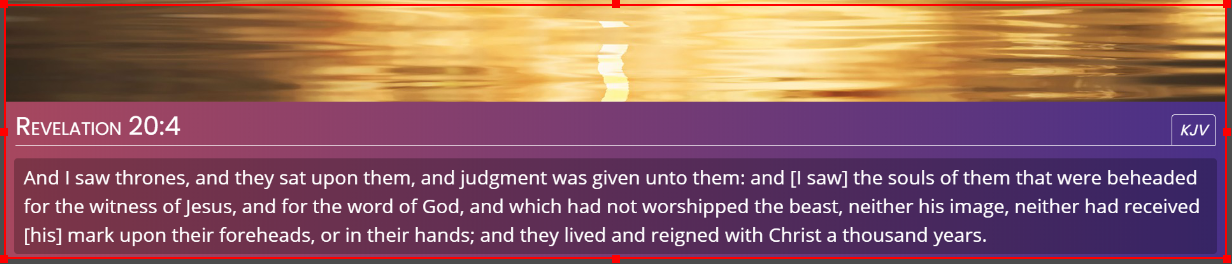
Automatic display height
Revelation 20:4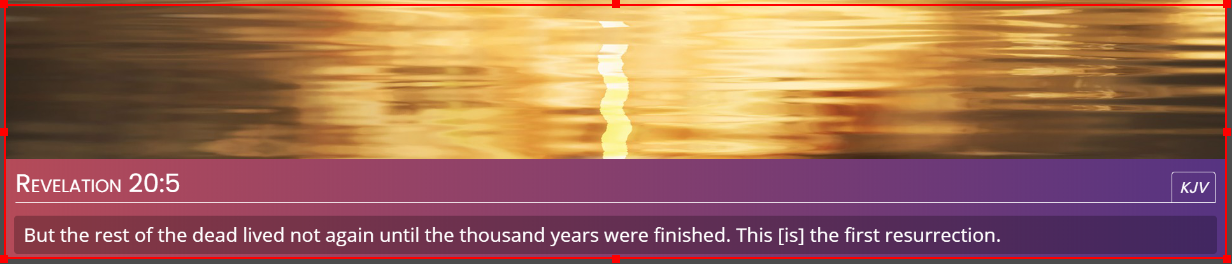
Automatic display height
Revelation 20:5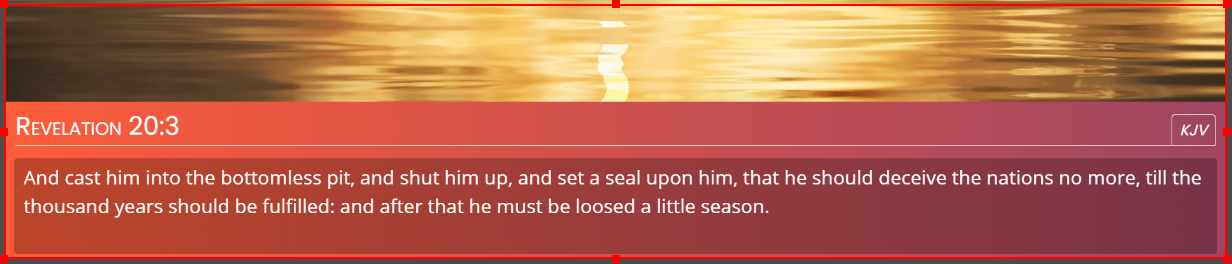
Longest verse display height
Revelation 20:3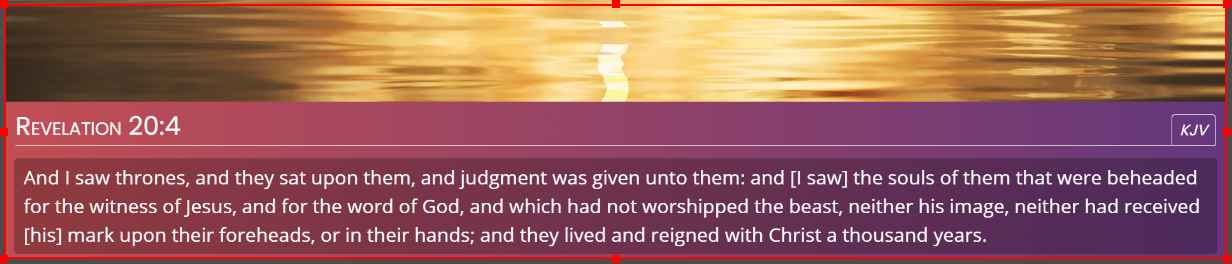
Longest verse display height
Revelation 20:4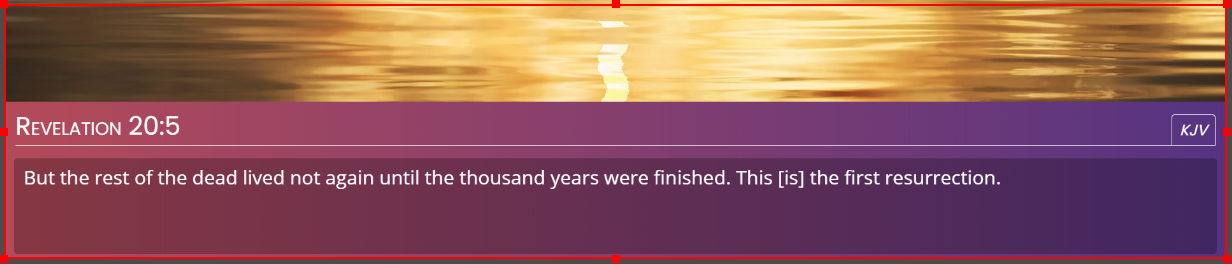
Longest verse display height
Revelation 20:5
Standard display height
Revelation 20:3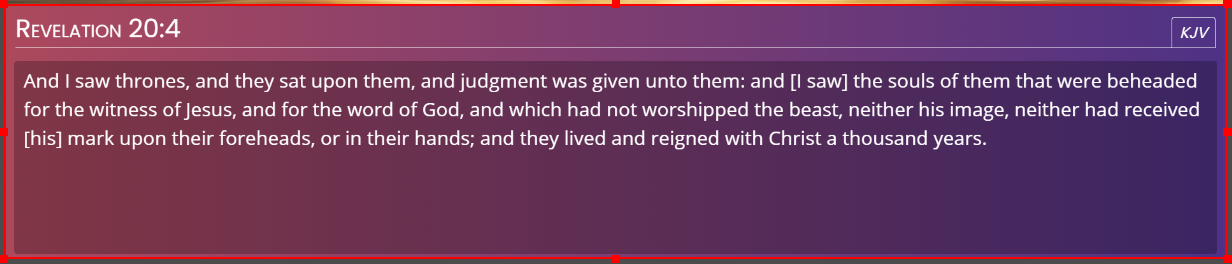
Standard display height
Revelation 20:4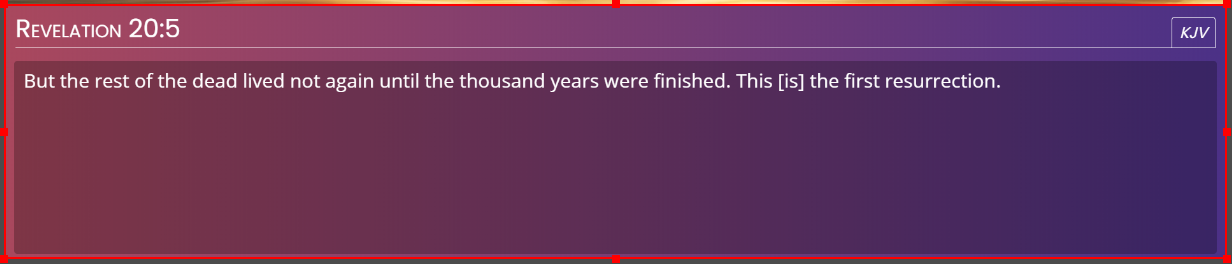
Standard display height
Revelation 20:5


Custom Themes and Font Scale / Display Height
All default themes support the Display Height and Font Scale options. However, if you are designing your own themes or customizing an existing one, you may, in rare cases, need to include support for the Standard display height and font scale in your own CSS. Please refer to the Theming Guide for further information.
- Keyboard Shortcuts
Here, you can adjust keyboard shortcuts. Click on a shortcut to change it, the arrow to revert it back to its default, or the X to unset it.
Please note that keyboard shortcuts only work if the dock has focus.
- Show Keyboard Shortcuts on Buttons
Toggles whether to show keyboard shortcuts on the toolbar and bottom bar when you hover over them. This option is purely cosmetic and does not affect the keyboard shortcuts themselves. (Enabled by default.)
- Strip Verse Newlines
Toggles whether to strip newlines from Bible verse texts. For many Bibles, this has no effect. However, some Bibles, including some popular Spanish ones, have embedded newlines in them which affect the display of the text. (Enabled by default.)
- Strip Footnote References
Toggles whether to strip footnote references: things like
[1],[2], etc. For many Bibles, this has no effect. However, some Bibles, including some popular Spanish ones, have them. (Enabled by default.)- License Key / Gift Code
Only applies to the Coffee Version. This section is not available in the free version.
If you have a license key or a gift code, most often for a theme pack, enter it here. For theme packs, a license key will allow you to use your new themes without any restrictions.
There are also two Advanced settings.
- Browser Target
- Experimental. This setting allows you to use multiple browser sources with one dock. This feature has many limitations, and its use is currently not recommended.
- Clear all saved data
This action cannot be undone. This setting deletes all user data, including verse list items, custom themes, modified keyboard shortcuts, and all changed settings. Bibles are preserved.